Get Professional-Looking Results: Step-by-Step Guide for Tiling your Bathroom Floor
Bathroom renovations can significantly boost the value and appeal of your home. One of the most transformative elements in this process is tiling the bathroom floor. This seemingly simple task can have a dramatic effect on the overall look and feel of your bathroom. In this comprehensive guide, we’ll walk you through the process of tiling your bathroom floor, from understanding the different types of tiles to the necessary tools, and a step-by-step guide on how to get it done. Whether you’re an experienced DIY enthusiast or a beginner eager to learn, this guide promises to make the process as smooth as possible.
Importance of Tiling in a Bathroom
Tiling plays a crucial role in bathrooms, not just for aesthetic purposes but also for practical reasons. Bathrooms are constantly exposed to water, and thus, the materials used need to be water-resistant. Tiles are perfect for this environment, as they are durable, waterproof, and easy to clean. They can also significantly improve the aesthetic appeal of your bathroom, with countless designs, patterns, and colors available on the market.
Benefits of a Well-Tiled Bathroom
A well-tiled bathroom can offer many benefits. Firstly, it improves the durability and longevity of the space, given that tiles are resistant to water and humidity. Secondly, tiles are easy to clean and maintain, making them a practical choice for areas with heavy foot traffic, like the bathroom. Lastly, a well-tiled bathroom adds a touch of elegance and sophistication, enhancing the overall interior décor of your home. The right choice of tiles can transform your ordinary bathroom into a relaxing and luxurious spa-like retreat.
Understanding Tiles and Their Types
Tiles come in various materials, each with its unique attributes. Let’s take a closer look at some of the most popular options.
Ceramic Tiles
Ceramic tiles are a common choice for bathrooms due to their durability and water resistance. Made from clay and fired at high temperatures, these tiles are available in a variety of colors and designs. They’re also relatively easy to cut and install, making them a favorite among DIY enthusiasts.
Porcelain Tiles
Porcelain tiles are another popular option for bathrooms. They’re a type of ceramic tile made from denser clay and fired at higher temperatures, making them even more durable and water-resistant than standard ceramic tiles. Porcelain tiles are also less porous, meaning they’re more resistant to staining and are an excellent choice for high-traffic areas.
Natural Stone Tiles
Natural stone tiles, such as marble, granite, slate, or travertine, add a touch of luxury and uniqueness to your bathroom. Each tile is unique, adding character and depth to your space. However, natural stone tiles need to be sealed to protect them from moisture and stains, and they require more maintenance than ceramic or porcelain tiles.
Glass Tiles
Glass tiles offer a modern and stylish look to any bathroom. They’re resistant to stains, mold, and mildew, making them an excellent choice for bathrooms. However, they can be slippery when wet, so they’re often used for walls or decorative accents rather than floors.
Necessary Tools for Tiling
Before you begin your tiling project, it’s important to gather all the necessary tools. This can make the process smoother and help ensure a professional-looking finish.
Electric Mixer
An electric mixer is essential for preparing the adhesive or thinset used to fix the tiles to the floor. Achieving the right consistency is crucial to ensure a strong bond between the tile and the floor. An electric mixer can help you do this efficiently and effectively.
Leveling Systems
A good leveling system is vital to ensure that your tiles are laid flat and even. This includes a level to check the flatness of your tiles, as well as tile spacers to maintain consistent gaps between the tiles for grouting.
Tile Cutters
Tile cutters are necessary for cutting tiles to fit around obstacles such as pipes or corners. There are different types of tile cutters, including manual cutters for small jobs and wet saws for larger projects and harder materials like porcelain or natural stone.
Trowels and Floats
Trowels are used to spread the adhesive or thinset onto the floor, while floats are used to apply and smooth out the grout between the tiles. These tools are essential for a successful tiling job.
Preparing Your Bathroom for Tiling
Before you can start laying tiles, you’ll need to prepare your bathroom. This involves several steps, including clearing the space, planning your layout, and preparing the floor surface.
Clear the Space
Start by clearing out your bathroom. Remove any furniture, fixtures, or appliances that could get in the way. You’ll also need to remove the old flooring if necessary. It’s important to have a clean and clear space to work in.
Plan Your Layout
Planning your layout is crucial to ensure a professional-looking result. Start by measuring your bathroom and sketching a rough layout of where you want your tiles to go. This will help you determine how many tiles you’ll need and where you’ll need to make cuts.
Prepare the Floor Surface
The next step is to prepare the floor surface. This may involve removing the old flooring, cleaning the subfloor, and installing an underlayment if necessary. You’ll want a clean, flat surface to lay your tiles on for the best results.
Step-by-Step Guide to Tiling Your Bathroom Floor
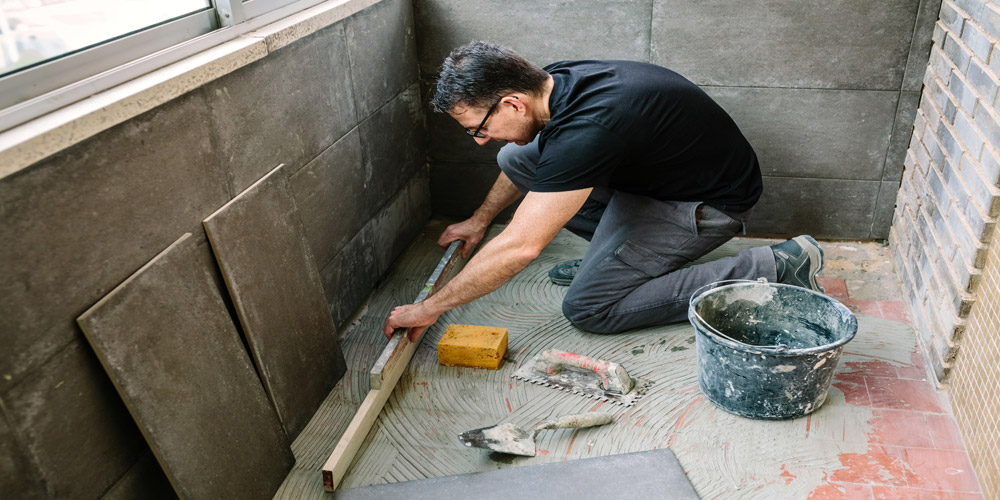
Now that you’ve prepared your bathroom and gathered your materials and tools, it’s time to start tiling. Here’s a step-by-step guide to help you through the process:
Step 1: Mixing and Applying Adhesive
Start by mixing your adhesive or thinset according to the package instructions. Use your electric mixer to achieve a smooth, peanut butter-like consistency. Once mixed, apply a thin layer of adhesive to a small section of the floor using your trowel. Remember to work in small sections to prevent the adhesive from drying out before you can lay your tiles.
Step 2: Laying the Tiles
Begin laying your tiles onto the adhesive, starting at the furthest point from the door and working towards it. This will prevent you from walking on your freshly laid tiles. Press each tile firmly into the adhesive, giving it a slight twist to ensure a good bond. Use your leveling system to ensure each tile is flat and evenly spaced.
Step 3: Cutting and Fitting Tiles Around Obstacles
When you reach an obstacle such as a pipe or corner, you’ll need to cut your tiles to fit. Measure the space carefully and mark the cut on your tile with a pencil. Then, use your tile cutter to make the cut. Once cut, apply adhesive to the floor and press the cut tile into place, ensuring it’s level with the surrounding tiles.
Step 4: Grouting the Tiles
Once your tiles are laid and the adhesive has dried, it’s time to grout. Mix your grout according to the package instructions, then apply it to the tile joints using your grout float. Use the float to push the grout into the joints and scrape off the excess. Make sure all joints are fully filled with grout for a watertight finish.
Step 5: Cleaning and Sealing the Tiles
After grouting, wait for the grout to start to set, then use a damp sponge to wipe away the excess grout from the surface of the tiles. Be careful not to disturb the grout in the joints. Once the grout has fully dried, you can apply a sealer if necessary to protect the grout and tiles from water and stains.
Maintenance Tips for Tiled Bathroom Floors
With proper maintenance, your newly tiled bathroom floor can last for many years. Here are some tips to keep your floor looking its best:
Regular Cleaning
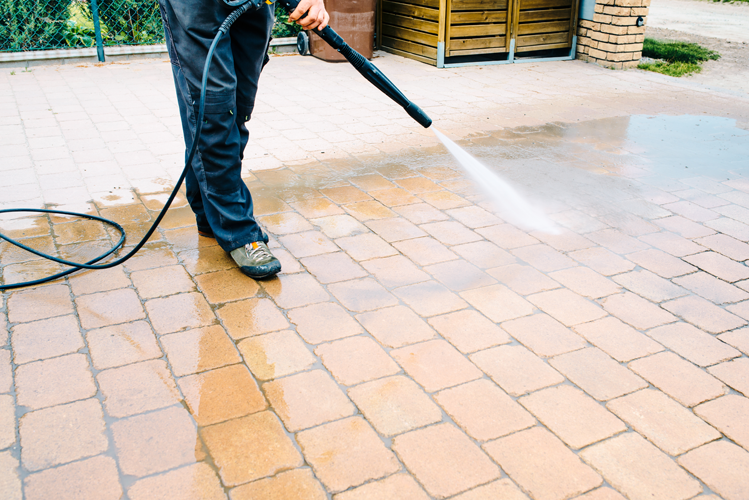
Regular cleaning is essential to maintain the look and longevity of your tiled floor. Use a mild detergent and a soft mop or cloth to clean your tiles. Avoid using abrasive cleaners or tools that could scratch the tile surface.
Periodic Resealing
If you’ve used a sealer on your tiles or grout, you’ll need to reapply it periodically to maintain its protective properties. The frequency will depend on the type of sealer and the amount of foot traffic your bathroom receives, but generally, resealing every year or two is a good rule of thumb.
Addressing Damages Promptly
If a tile becomes cracked or damaged, it’s important to address it promptly to prevent further damage. Depending on the extent of the damage, you may be able to repair the tile or it may need to be replaced. In either case, addressing damages promptly can help maintain the appearance and durability of your floor.
Conclusion
Tiling your bathroom floor can seem daunting, but with the right tools, materials, and guidance, you can achieve a professional-looking result. By following this step-by-step guide, you’re well on your way to transforming your bathroom into a beautiful and functional space. Remember, the key is in the preparation – take the time to plan your layout, prepare your floor, and gather your tools before you start. Happy tiling!