Create the Perfect Block Paved Driveway & Patio
The Importance of Planning Your Block Paved Driveway and Patio
Creating a block paved driveway or patio brings numerous advantages, making it a popular choice among homeowners. Block paving offers durability, aesthetic appeal, and versatility. The wide variety of colours and patterns available allows you to personalise your outdoor space while ensuring that it can withstand the test of time, even under heavy use. Moreover, block paving is relatively low-maintenance, requiring simple cleaning and occasional joint replenishment to keep it looking fresh.
However, the success of your project hinges on proper planning and preparation. Without a clear strategy, you may encounter issues such as inadequate drainage, uneven surfaces, or insufficient load-bearing capacity. Taking the time to assess your site and consider your design options can save you both time and money in the long run.
To ensure a smooth installation process, it’s essential to follow five key steps:
Site Assessment and Design: Begin by evaluating the existing space and drainage requirements. It’s crucial to understand how water will flow across your property to avoid potential flooding or erosion.
Ground Preparation and Excavation: This step involves removing any existing surfaces and excavating to the required depth. Proper drainage must also be ensured at this stage.
Laying the Base and Sand Bedding: A stable base layer is vital. After installation, you’ll add and level a sand bedding layer, ensuring there are appropriate slopes for water runoff.
Block Paving Installation: Selecting the right type and colour of block pavers is integral to achieving your desired look. Careful laying of the blocks in your chosen pattern follows next.
Finishing Touches and Maintenance: Completing your project involves filling joints with sand, applying sealant, and discussing ongoing maintenance requirements to prolong the life of your new surface.
By adhering to these steps, you set the foundation for a successful block paved driveway or patio, enhancing both functionality and aesthetics for years to come.
Step 1: Site Assessment and Design
Evaluating the Existing Space and Drainage Requirements
Before commencing any work on your block paved driveway and patio, it is vital to assess the existing space thoroughly. Begin by examining the current surface, noting any uneven areas or damage that may need addressing. Additionally, understanding the drainage requirements is crucial. Look for low spots where water tends to accumulate and identify any existing drainage systems. Proper drainage will help prevent flooding and erosion, ensuring the longevity of your block paving.
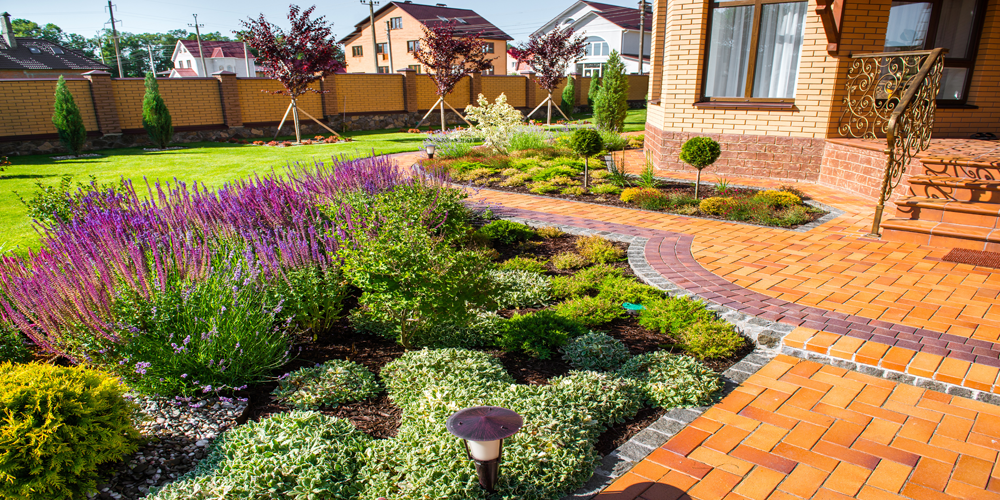
Considering Layout Options and Patterns for Block Paving
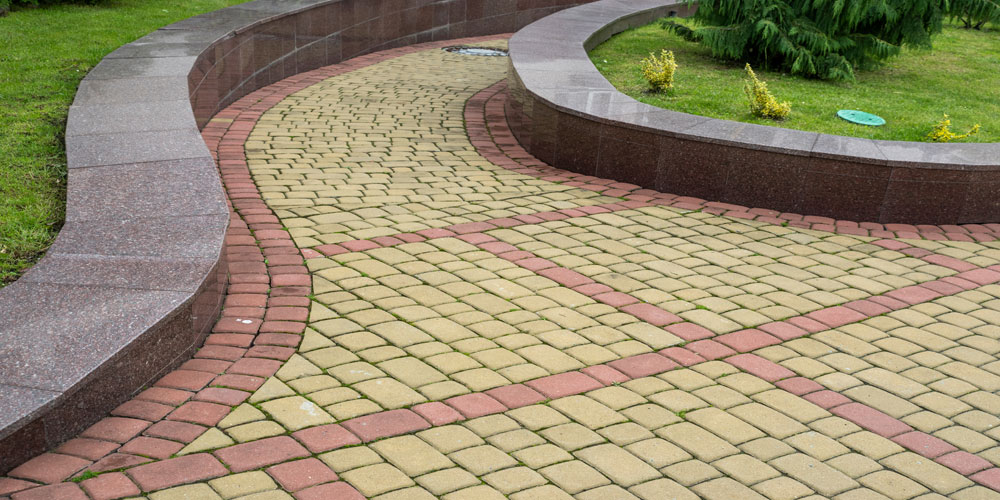
Once you have a clear picture of the site conditions, it’s time to consider layout options and patterns for your block paving. The design should complement your home’s architecture while also fitting seamlessly into the surrounding landscape. Common patterns include herringbone, basketweave, and stretcher bond. Experimenting with different arrangements can yield unique visual effects, enhancing curb appeal and functionality.
Determining the Size and Shape of the Driveway and Patio Areas
After finalising the layout, determine the size and shape of the areas designated for your driveway and patio. Take measurements to ensure they are proportionate to your property and meet your functional needs. For driveways, consider the vehicle types and traffic flow, while for patios, think about the intended usage, such as dining or lounging spaces.
This careful planning lays a solid foundation for the next steps in the process, ensuring that your block paved surfaces not only look great but also serve their purpose effectively.
With the site assessment and design well underway, you can now focus on the essential groundwork needed for a successful installation.
Step 2: Ground Preparation and Excavation
Ground preparation and excavation form the backbone of your block paving project. This stage is critical for ensuring that the driveway or patio will have a solid foundation and good drainage.
Remove Existing Surfaces
The first step in this process is to clear the area of any existing materials. This may include grass, concrete, or old paving stones. Use a spade or mechanical excavator to remove the surface down to the soil. This ensures that you start with a clean slate and can properly assess the condition of the ground underneath.
Excavation Depth
Next, excavate to the required depth, typically between 200-250mm. The exact depth will depend on the intended use of your driveway or patio. For light vehicle traffic, a depth closer to 200mm may suffice, while heavy usage may require deeper excavation. Proper depth is essential for achieving the right load-bearing capacity and preventing future settling.
Ensure Proper Drainage
Drainage is vital to prevent water pooling and potential erosion. As you excavate, assess the natural slope of the land and ensure that your design accommodates this. Installing drainage systems, such as soakaways or drainpipes, will help manage excess water effectively. Consider where the water will flow and ensure that it moves away from your property.
Create a Stable Sub-base
Once excavation is complete, it’s time to create a stable sub-base. Use materials like crushed stone or hardcore for this layer. Compact it thoroughly to eliminate air pockets and enhance stability. A well-prepared sub-base is crucial for the longevity of your block paving, as it provides a robust foundation that can withstand pressure and heavy loads.
With the ground prepared and excavated correctly, you are now ready to move onto laying the base and sand bedding, setting the stage for the installation of your block paving.
Step 3: Laying the Base and Sand Bedding
Once the ground has been prepared and excavated, it’s time to focus on laying the base and sand bedding. This step is vital for ensuring that your block paved driveway or patio has a solid foundation capable of withstanding traffic and maintaining its appearance over time.
Installing and Compacting the Base Layer
The first task in this stage is to install the base layer. Typically made from crushed stone or hardcore, this layer should be about 150-200mm thick, depending on the load it needs to bear. It’s crucial to evenly distribute the material across the area. Once laid, the base must be compacted thoroughly using a plate compactor to remove air pockets and create a stable platform. This compaction process enhances the strength and stability of the structure, ensuring that it can handle heavy loads without sinking or shifting.
Adding and Leveling the Sand Bedding Layer
After the base layer is compacted, the next layer is sand. A layer of around 30-50mm of sharp sand is usually sufficient. This sand should be spread evenly across the compacted base. Using a screeding bar or straight edge, level the sand to ensure a flat surface. The aim is to create a smooth, even layer that will serve as a bed for the block pavers.
Ensuring Proper Slopes for Water Runoff
An essential consideration when laying the sand bedding is to ensure appropriate slopes for water runoff. A slight gradient (typically around 1:80) should be established away from buildings and structures. This slope helps direct water towards drainage areas, preventing pooling and potential damage to the paving.
By carefully following these steps, you set a robust foundation for your paving project. The next phase will focus on the installation of the block paving itself, where all your groundwork will begin to take shape into a beautiful and functional driveway or patio.
Step 4: Block Paving Installation
Choosing the Right Type and Colour of Block Pavers
The selection of block pavers is crucial for achieving both functionality and aesthetics in your driveway and patio. Consider factors such as material, size, texture, and colour when choosing your pavers. Common materials include concrete and clay, each offering unique benefits. Concrete pavers are durable and versatile, while clay pavers provide a classic, timeless look.
When it comes to colour, think about the overall design of your home and surrounding landscape. A cohesive palette will enhance the curb appeal, whereas contrasting colours can create a vibrant focal point. It’s wise to obtain samples and lay them out in your intended space to see how they interact with natural light throughout the day.
Laying the Blocks in the Desired Pattern
Once you have selected your pavers, it’s time to lay them down. Start from one corner of the area and work methodically outwards. Using a rubber mallet, gently tap each block into place to ensure they are snugly fitted. Maintaining a consistent joint width of 2-5mm between blocks is essential for effective interlocking and drainage.
To keep your layout aligned, use string lines as guides. Regularly check that the blocks are level and uniformly spaced. Various patterns can be used, such as herringbone or basketweave, which add visual interest and strength to the structure.
Cutting Blocks to Fit Edges and Curves
Inevitably, some areas will require cutting blocks to fit neatly around edges or curves. For this, a block splitter or a diamond blade saw is recommended. Measure carefully before making any cuts to ensure a precise fit. Neatly cut edges not only enhance appearance but also prevent gaps that could lead to instability or shifting over time.
As you progress with the installation, remember to step back periodically to assess the overall look of your paving. This will help maintain consistency and allow for adjustments as needed, ensuring the final result meets your design vision.
With the block paving securely laid, you’re now one step closer to completing your project, ready to move on to the finishing touches that will bring your vision to life.
Step 5: Finishing Touches and Maintenance
Filling Joints and Compaction
Once your block paving installation is complete, it’s time to focus on the finishing touches. Begin by filling in the joints between the pavers with jointing sand. This process involves sweeping the sand into the gaps and ensuring each space is adequately filled. Compact the surface using a vibrating plate compactor. This action not only helps to settle the blocks but also ensures that the sand fills the joints effectively, providing structural integrity to the paving.
Applying Sealant
Next, consider applying a sealant to protect your new driveway or patio. Sealants enhance the appearance of the blocks while acting as a barrier against moisture, oil stains, and general wear and tear. Choose a high-quality sealant suitable for block paving, and follow the manufacturer’s instructions for application. Typically, this involves cleaning the surface thoroughly before applying the sealant evenly across the area. Allow adequate drying time to achieve optimal protection.
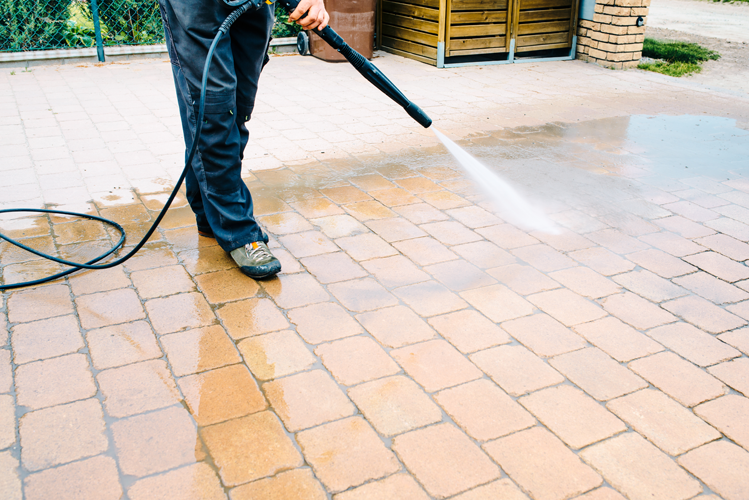
Ongoing Maintenance
Maintaining your block paved areas is essential for their longevity and aesthetic appeal. Regular maintenance includes:
Cleaning the surface periodically to remove dirt and debris.
Weeding to prevent unwanted plants from disrupting the joints.
Re-sanding the joints every few years to maintain stability.
Resealing every few years, depending on the type of sealant used.
By committing to these maintenance practices, you can ensure that your driveway and patio remain in pristine condition for years to come.
With these final touches and an ongoing maintenance plan, you’ll be well-equipped to enjoy your new block paved driveway and patio. This attention to detail will not only enhance the beauty of your property but also contribute to its overall value.
Enjoying Your New Block Paved Driveway and Patio
Following the essential steps outlined throughout this guide ensures a successful block paved driveway and patio installation. The benefits of taking the time to plan carefully cannot be overstated. A well-executed project not only enhances your property’s curb appeal but also provides long-lasting functionality and durability.
Long-term Value and Aesthetics
Block paving is known for its aesthetic versatility, allowing homeowners to choose from various colours, styles, and patterns that complement their properties. This level of customisation means your driveway or patio can reflect your personal taste while increasing the overall value of your home. Properly installed block paving creates a strong surface that withstands the test of time, reducing the need for frequent repairs or replacements.
Moreover, consistent maintenance, as discussed in the final step, further protects this investment. Regular cleaning, sealing, and weeding help maintain both appearance and structure, ensuring your paved areas remain inviting and functional for years to come.
Professional Assistance
While DIY projects can be rewarding, enlisting professional landscaping services to help for your block paving installation can yield superior results. Experienced contractors bring expertise and precision to the project, ensuring all steps are followed meticulously. They can recommend the best materials and designs suited to your specific needs, ultimately saving you time and potential costs associated with mistakes.
Enjoying your new block paved driveway and patio means appreciating the investment in quality, design, and upkeep. With the right planning and execution, you will create an outdoor space that adds beauty and value to your home for years ahead.